One of my favorite weekend breakfasts is waffles. I love making a big batch and putting them in the freezer for easy weekday meal options. I made this double recipe a few weeks ago and stocked up our freezer before Henry was born. These are a hearty, satisfying waffle that I top with nut butter/yogurt and fruit.
Ingredients:
4 eggs, beaten
2 teaspoons coconut oil, melted
2 Tablespoons honey
6 teaspoons baking powder
2 shredded apples (I used granny smith)
1 cup milk
pinch of salt
1 Tablespoon vanilla
1 Tablespoon cinnamon
2 Tablespoons flax meal
1 1/2 cups whole wheat flour
Directions:
Mix wet ingredients together (eggs, coconut oil, honey, milk, vanilla)
Add dry ingredients (baking powder, cinnamon, flax meal whole wheat flour)
Fold in shredded apples
Bake according to waffle maker directions
Enjoy!

Adventures with Chris and Sonya-where you can catch up with us and our ever-changing lives!
Showing posts with label recipes. Show all posts
Showing posts with label recipes. Show all posts
Thursday, February 7, 2013

Sunday, December 23, 2012
Dark Chocolate Sea Salted Toffee
After we were married, C's Mom gifted me with an awesome book, a homemade book of all of the family's favorite Christmas cookie and candy recipes! When I was planning my holiday baking this year, I asked C what he wanted me to make and his answers didn't surprise me: Chocolate Peanut Butter Buckeyes and Toffee. I also wanted to make some cut-out frosted sugar cookies and peanut butter cookies so I had a very short list this year...thankfully as we don't need all the sweet treats and I certainly won't be running off the extra calories for another couple of months. We give most of my baking away, either to neighbors or work clients or colleagues so we don't have too much of it floating around but it wouldn't be the holidays without some of the good stuff!
 |
| My holiday cookie Bible! |
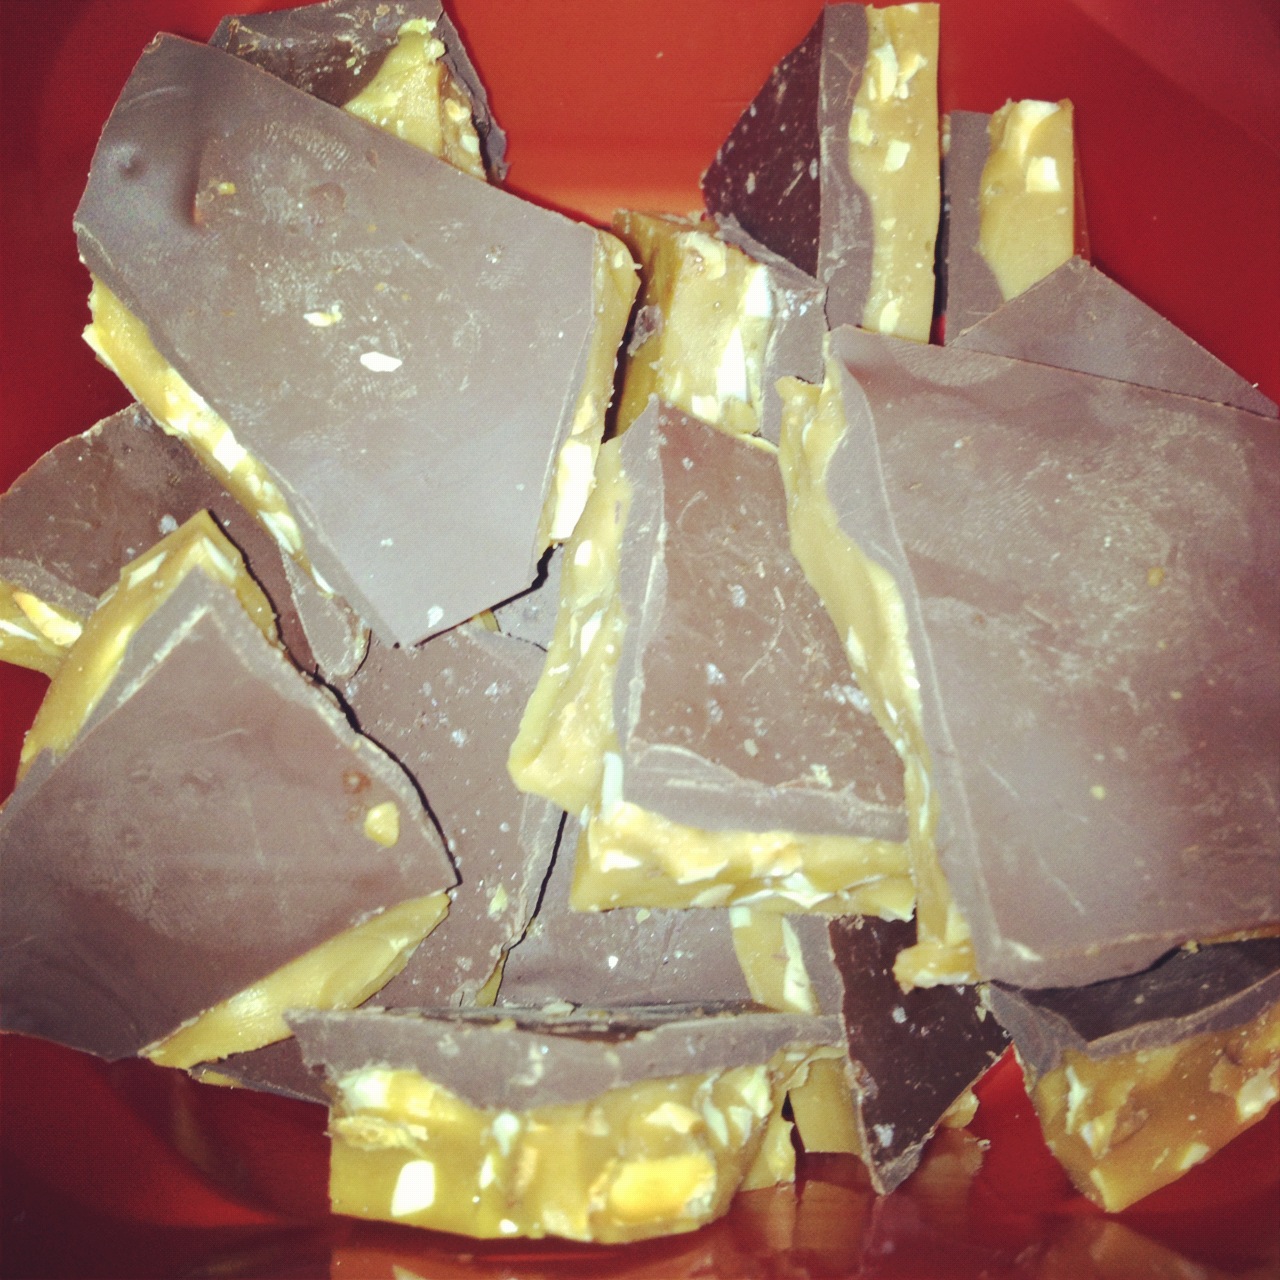
Ingredients:
1 cup butter
1 1/4 cups sugar
2 T corn syrup
2 T water
1 cup almonds, slivered and toasted
1-2 cups DARK chocolate chips (I used Ghiradelli 60% Cacao Bittersweet Chocolate)
Course sea salt
Directions:
Line a 15x10x1in pan with foil, evenly sprinkle almonds on bottom of pan and set to the side. In a heavy saucepan (with candy thermometer attached-very important!) combine butter, sugar, corn syrup and water on medium to medium high heat. Stir mixture constantly until it boils. Continue to cook (and stir) until 300F on candy thermometer. Remove from heat and pour mixture over almonds until even. Sprinkle chocolate over brittle and let stand until shiny. Smooth with a spatula and top sprinkle with sea salt (personal preference on how much to add). Let cool and refrigerate for 1 hour. Store at room temperature in a sealed container (don't store with any other treats as the moisture content of cookies will make the toffee soft and sticky) and enjoy!
Monday, December 17, 2012
Ham and Corn Chowder
As promised, here is my friend Lea's Ham and Corn Chowder recipe. I'm going to post this one 2 ways: her original (super delicious and fast) recipe and my edited recipe (less canned ingredients because I used what we had on hand, less dairy).

Ham and Corn Chowder (Lea's version)
Ingredients:
1 package baked ham, diced
1 can sweet kernel corn, rinsed and drained
1 can cream corn
1 small onion, chopped
2 cans diced potatoes, rinsed and drained
6 cups milk or cream
1 bag shredded cheese, 2 cups
butter
2 T. flour
salt and pepper
Ham and Corn Chowder (Sonya's version):
1 T. olive oil
2 T. whole wheat flour
1/2 lb deli ham (we used black forest)
2 cups frozen corn, thawed-puree 1 cup and leave the other in kernel form
1 onion, chopped
2 potatoes, diced
1-2 cups chicken stock
2-3 cups fat free milk
1 cup sharp cheddar cheese
salt and pepper to taste

Directions are the same for each version:
- Saute ham and onion in butter (or olive oil) on medium heat until brown.
- Stir in 2 T. flour to thicken.
- Stir in corns and potatoes.
- Add liquids (broth and milk or milk/cream).
- Season with salt and pepper to taste.
- Reduce to low heat.
- Add cheese and stir until melted.
- Enjoy!
Saturday, October 27, 2012
Pumpkin cheesecake dip
Last night, we had out neighbors over for dinner and I made this dip for an appetizer, it was delicious, light, fluffy and perfect for fall!
Ingredients:
15 oz can pumpkin
8 oz whipped cream cheese
1/4 cup honey
1 teaspoon pumpkin pie spice
1 container cool whip free
Optional garnish-spiced nuts (pumpkin seeds, pecans)
Dippers-apple slices, cinnamon pita chips, graham cracker sticks
Combine all dip ingredients (except cool whip) and mix well. Carefully fold in cool whip until just incorporated. Put in serving dish and refrigerate until ready to serve.
When ready to serve, top with spiced nuts and serve with dippers. Enjoy!
Thursday, July 26, 2012
Grilled cauliflower pizza
I posted this photo on Facebook and immediately had requests for the recipe :). For good reason, it was delicious! I just threw it together so I don't have exact measurements but here's my best guess.
First, we need to go over tips for grilling pizza. Our grill, a Holland grill, has a very close waffle pattern grid instead of the traditional grates. It also used indirect heat so the food cooks evenly. If you are using a traditional grill, you may need to use a baking sheet and turn on low or turn off one side and place your pizza there. The other to remember is to make the pizzas small to make it easier to transfer to the grill.
Now, on to the pizza!
1. Slice cauliflower into small, flat pieces. I used about 1 cup per pizza. Toss in a drizzle of olive oil, salt, pepper and roasted red pepper flakes.
2. Roll out pizza dough (I always keep whole wheat bread dough in the fridge) into thin 6-8inch circle, flour bottom well. Place on cookie sheet to transfer to grill.
3. Top dough with pesto (about 1 tsp?), completely to the edge.
4. Sprinkle with 1/4 cup shredded mozzarella and Parmesan cheese.
5. Top with cauliflower and a bit more Parmesan cheese, if desired.
6. Next is the trickiest step, transferring to the grill! Carefully slide pizza into grill. This is why we make the pizzas small, it still takes both of us :) and still gets wonky sometimes. Rearrange toppings if neccesay.
7. Because we are using indirect heat, we start the grill after cooking (also makes it easier to transfer to the grill). You can preheat the grill if you are using baking sheet.
8. Cook 15-20 minutes until crust is done (ours is usually a bit charred on the edge kind of like a wood-fired oven pizza), cheese is melted and toppings are cooked! Depending on the grill, timing may be different so keep an eye on your pizza. We then slide off the pizza with a large grilling turner. Enjoy!

Tuesday, May 15, 2012
Meal planning
After eating left-overs from our Cinco de Mayo party/graduation party, you would think we would have had our fill of Mexican but no! On Monday, I made Mexican Quinoa for our meatless meal and served with avocados. This time I used already cooked qunioa to cut down on cooking time and added a can of black beans. The whole process took about 20 minutes for a fast and filling dinner.

Tuesday- Baked Italian Tilapia, asparagus and fresh baked bread
Wednesday-Grilled bratwurst and broccoli
Thursday-Grilled chicken and skillet sauteed green beans
Friday-???
Most of these recipes are quick and simple! The weather has been so nice, I don't want to spend time in the kitchen (that explains all of the grilling). What are some of your go-to dinners?
Monday, April 30, 2012
Chipotle-Style Pulled Pork
I've had a request for the Chipotle style pulled pork that we are having this week and I cannot find the recipe (and I had made some changes) so here's what I used:
3 lb Pork tenderloin (pork roast or shoulder would work as well)
1 onion, thinly sliced
2 bay leaves
2 cloves
1 T tomato paste (we didn't have any tomatoes)
3 chipotle peppers in adobo sauce, sliced and sauce added (this gives a nice heat to the pork, less if you are sensitive to spice)
1 teaspoon cumin
1/2 teaspoon oregano
1/4 teaspoon garlic powder
1/4 teaspoon onion powder
3/4 cup water
salt and pepper to taste
Spray crock pot with non-stick cooking spray. Spread onions in a layer over the bottom of the crock pot.
Liberally salt and pepper all sides of tenderloin. Mix remaining herbs together and coat tenderloin. Place tenderloin on top of onions.
Add peppers with adobo sauce and tomato paste to water and stir until paste dissolves. Carefully pour mixture around (not on top of) the tenderloin. Cook on low for 4-6 hours or until done. Remove meat from crock pot. Remove bay leaves and cloves and discard. Shred meat and place back in crock pot on warm for to absorb sauces or until ready to serve.
We will be serving with corn tortillas, homemade queso sauce (left over from last week's dinner), blackbeans and lots of veggies. Enjoy!
Saturday, April 14, 2012
Date Nut Energy "Brownie" Bites
I've made this recipe a couple of times over the past few months and it's a winner (this one is soooo easy)! I try to keep a batch in the fridge for fast fuel on the go. Sorry it took me so long to get around to blogging them. These are the perfect pre- or post- workout snack and are packed full of energy from the dates and nuts.
Ingredients:
1 cup dates, chopped and pitted
1/2 cup raw almonds
1/2 cup raw cashews
1/2 cup unsweetened cocoa powder
1/2 teaspoon espresso powder (optional)
1-2 teaspoons filtered water

Directions:
Pulse ingredients together in food processor until mixture sticks together.
I usually add a teaspoon or two of water to get the mixture to stick.
Roll into balls and store in fridge.
Before adding water:

After adding water (one teaspoon at a time):

After rolling into balls (I use a pampered chef cookie dough baller, works great:

Lemon pull-apart bread
I've made this recipe twice (once to try and once for Easter morning) and it is delicious! A perfect alternative to cinnamon rolls for special breakfasts....and the glaze is out of this world, I could eat it straight out of the bowl. I've seen several versions of this bread on Pinerest but I based my recipe one I found at Two Tiny Kitchens.

Ingredients for Dough:
2 1/2 cups flour (I used 1 cup whole wheat and 1 1/2 cups white)+ extra for rolling and kneading
1/4 cup honey
2 1/4 tsp yeast (one packet)
1/2 tsp salt
5 TBSP milk
4 TBSP butter
1/8 cup water
2 tsp vanilla
2 eggs
Ingredients for Lemon Paste Filling:
1/2 cup honey
Zest from 2 lemons (just the yellow part on the outside)
1 TBSP butter, softened
Ingredients for Lemon Cream Cheese Glaze:
2 oz cream cheese, softened
2 TBSP butter, softened
1/2 cups powdered sugar
Juice of 1 lemon (watch for seeds)
1 tsp milk (or more, depending on preference of glaze thickness)
To make dough:
Place butter and milk in microwaveable bowl. Microwave until butter melts, stirring occasionally. Allow to cool (1 minute) and add water, honey and vanilla.
In large bowl (I used the bowl for my KitchenAid mixer because I would be using it to knead), place 2 1/2 cups flour, yeast and salt.
Pour butter/milk mixture into dry ingredients and mix with paddle attachment.
Stir until combined and then add eggs, one at a time, until fully incorporated.
Change paddle to kneading hook and knead until smooth, 5-10 minutes. Because of the honey, I found the dough to be sticky and added extra (about 1/4 cup) additional flour.
Place the kneaded dough in an oiled bowl (turning dough until covered in oil) and cover with a tea towel.
Set aside in a warm place until doubled in bulk (about 1 1/2 hours-the whole wheat flour leads to lengthened rising time)
While dough is rising grease bread pan and get started on Lemon Paste Filling:
Mix honey, zest and butter until well combined. Set aside.
Once the dough has risen, roll out on a well-floured surface into a 20x12" rectangle (or something close). Spread with lemon paste filling, pressing to adhere to the dough.
Cut dough into strips, 4x12", and stack them onto each other.
Cut the stack into smaller pieces, 2x4".
Place cut stacks into prepared bread pan with cut sides up.
Fan out the slices to fill the pan, using fingers.
Preheat oven to 350 degrees.
Cover loaf pan and allow bread to rise until double in size (about 1 1/2 hours).
Bake loaf for 25-35 minutes, until the top is golden brown. Mine looked like this:

To prepare the glaze, cream together cream cheese and butter.
Then add powdered sugar, lemon juice and milk and mix until combined.
Remove bread from oven and place on wire rack to cool. After 10 minutes, remove from pan and cool completely. Then top with lemon glaze and enjoy!

What are some of your favorite special occasion breakfasts?
Quinoa pancakes
For my birthday, I took the day off of work and enjoyed a wonderful day shopping, lunch and at the spa with my Mom (such a nice birthday treat!). Since I had a little extra time, I decided to whip up some quinoa pancakes and they were delicious! I topped mine with Sunflower butter, fresh strawberries and a touch of homemade honey whipped cream (it was my birthday, after all). I found the original recipe at My Life Runs on Food but I did make a few changes:
Ingredients:
1 cup whole wheat flour
1/2 TBSP baking powder
1/4 TSP salt
1 TBSP honey
1 egg
1 TSP vanilla extract
1 TSP cinnamon
1/2 cup cooked quinoa
1 cup milk
1/2 cup blueberries (optional)
Olive oil for greasing skillet
Directions:
Preheat skillet to medium heat and add olive oil.
In large bowl, mix dry ingredients (flour, salt, baking powder, cinnamon) in bowl and set aside.
In a seperate bowl, whisk together honey, egg, milk and vanilla.
Add liquid ingredients, quinoa and blueberries into dry mixture. Don't over mix, batter will have lumps (this gives fluffy pancakes).
Spoon 1/4 cup batter into skillet. when bubbles appear in the surface, flip. When both sides are golden brown, remove and enjoy!
We found these pancakes to be surprisingly light and fluffy. Chris couldn't even tell the quinoa was there. They were really satisfying and left me full until lunch!

Monday, March 5, 2012
Sweet potato chips and meal planning
Now that I'm back to feeling better and classes, meal planning is on!
Sunday-Chicken/black bean quesadillas and sweet potato chips
Monday-Orange roughy filets and butternut squash risotto (I have butternut puree in the freezer I'm trying to use up)
Tuesday-Crock pot roasted chicken
(Meatless) Wednesday-Potato and leek soup
Thursday-Left overs
Friday-Local Catholic church fish fry
Have you ever made sweet potato chips? They are easy and delicious!
Ingredients:
Sweet potatoes
Olive oil
Salt and pepper, to taste
Preheat oven to 350. Peel and slice sweet potatoes (very thin slices, I use my food processor so they are nice and even). Toss in bowl with a touch of oil and salt and pepper. Layout in a single layer on a parchment lined cookie sheet. Place in oven and bake until crisp (varies depending on thickness). I like to flip mine at the halfway point, 20 minutes or so. Chips will shrivel and start to brown.
Sweet potatoes ready for the oven!

Wednesday, February 22, 2012
Broccoli Cheddar Soup
We make a lot of soup around here (1-2 times per week in the cold weather months). Sometimes I follow recipes and other times, the recipe is more like a guideline. I received a request for our Broccoli Cheddar soup recipe so here it is (based off a Williams-Sonoma recipe).


Ingredients:
1 Tbs olive oil
1/2 yellow onion, diced
2 cloves garlic, minced
2-3 heads broccoli, cut into florets
3 cups stock (vegetable or chicken)
3-4 kale leaves, stalk removed and torn into small pieces
salt and pepper, to taste
2 Tbs beer
6 oz Monterey jack cheese, shredded
1/4 cup Pargmigiano-Reggiano cheese, shredded
1/8 tsp cayenne pepper
In large soup pot, over medium heat, add olive oil, onion and garlic. Cook, stirring occasionally, until tender and slightly colored.
Increase heat to high, add broccoli, stock and some salt and pepper, bring to a simmer. Cook about 5 minutes, add kale for another 5 minutes or until vegetables are tender.
Either transfer mixture into blender or food processor in batches until soup is pureed or use emulsion blender to puree (got one of these for Christmas...love it). Add beer and cheese and stir over low heat until cheese is melted and ingredients combined. Serve with fresh baked bread and enjoy.
Either transfer mixture into blender or food processor in batches until soup is pureed or use emulsion blender to puree (got one of these for Christmas...love it). Add beer and cheese and stir over low heat until cheese is melted and ingredients combined. Serve with fresh baked bread and enjoy.

How do you make broccoli soup?
Sunday, February 5, 2012
Baked oatmeal

So I had a question on my post last week about baked oatmeal so I thought I would share my recipe. I bake a batch (or 1/2 a batch) of oatmeal on the weekend and then have a fast and easy breakfast on my busy mornings. I've also made a version with steel cut oats, it varies every time I make the recipe!
Baked Oatmeal (1/2 batch):
1 cup old fashioned oats
1/8 cup brown sugar
1 1/2 teaspoons cinnamon
1/2 teaspoon baking powder
pinch of salt
3/4 cups milk
1 teaspoon melted butter (optional)
1 egg, lightly beaten
1 teaspoon vanilla
1 large Granny Smith apple, cored and diced (I run it through the grater on my food processor)
Preheat oven to 350 degrees. Grease baking dish (8x8in) and set aside.
In a large bowl, whisk milk, butter, egg and vanilla together. Then add baking powder, salt, cinnamon and brown sugar, mix well. Stir in oats and then apples. Pour mixture into prepared pan.
Bake 15-20 minutes or until oatmeal is golden brown and set. Then I let it cool and place into the fridge until I'm ready to eat. I heat it in the microwave and then top with sliced almonds, unsweetened coconut, and fresh berries.
This makes enough for 3-4 mornings, which is perfect because I alternate with breakfast smoothies to mix it up.
Wednesday, January 11, 2012
Spinach Lasagna-Recipe
I had a request for our spinach recipe so here it is...I usually just throw it together so here it is as best as I can remember. It's a great way to sneak in some veggies into your pasta. I made it earlier in the week and I'm bake it tomorrow before heading to class, you know, so C doesn't starve while I'm gone :)
Ingredients:
1 24oz jar marinara sauce (I like to use home-made jarred sauce but your favorite will do)
1 box lasagna noodles-whole wheat
1 10oz bag frozen spinach, thawed and drained (or not...depending on how much time I have)
3 stalks Kale, de-veined, washed and torn into bite-sized pieces
1 onion-diced
2 cloves garlic-diced
1 lb spicy Italian sausage-bulk
8 oz mozzarella cheese
Parmesan cheese-freshly grated
Directions:
1. Cook lasagna noodles according to package directions, in salted water. Drain and let cool until ready to use.
2. Meanwhile, in pan brown sausage, onions and garlic. Break up sausage into small pieces with fork while cooking. A few minutes before sausage is done, add spinach and kale. Drain any liquid and let cool.
3. In a deep dish, starting with sauce, layer the noodles, sausage and spinach mixture, and cheese. Repeating until get to the top layer, ending with cheese (mozzarella and then Parmesan).
4. Bake in oven for an hour at 350 degrees, or until cheese is browned and edges are bubbly. Let cool for 10 minutes before serving. Enjoy!
Note- I usually double and make two, one for dinner and one for the freezer to save time later.
Saturday, January 7, 2012
Cauliflower Mac and Cheese (and meal planning)
My classes resume this week so I thought I would get a jump on meal planning/grocery shopping/food prep as well as share our meatless recipe for the week. I spent the afternoon in the kitchen getting a jump start on our meals for the week (and putting together a few frozen meals for a friend on bed-rest). I also whipped up some brownies using three kinds of chocolate, black beans and almond flour....but more on those in another post.
Our menu for the week is:
Sunday-Rivel (or Ribble based on your family) soup, as requested by Chris. Every family makes theirs differently; I include chicken, onions, potatoes and the rivels (a rustic, easy to make dumpling).
Monday-Sweet potatoes with chicken and rosemary saute
Tuesday (our meatless meal)-Cauliflower Mac and Cheese (already made)
Wednesday-Kale and Spinach lasagna (already made)
Thursday-Missy's White Chicken Chili (already made)
Friday-left overs/go out
The secret ingredient of our mac and cheese-cauliflower!

Sometimes you just want comfort food and that is what this mac and cheese is, comfort food with a healthy twist. Instead of using straight macaroni noodles, I use 100% whole wheat pasta with cauliflower...once it gets covered with cheese, it's hard to notice! The recipe is adapted from Real Simple magazine.
Ingredients:
12 ounces whole wheat pasta (I like to use a fun, twisty shape like cavatappi or rigatoni)
1 head cauliflower, chopped
2 slices whole grain bread
1/4 cup dried parsley or 1/2 cup fresh
1/4 fresh grated Parmigiano cheese
olive oil
1 onion, finely chopped
1 1/2 cups grated cheddar cheese (I like extra-sharp cheddar....more flavor!)
1 1/2 cups fat-free sour cream
1/2 cup fat free milk
salt and pepper to taste
Directions:
1. Start by heating the oven to 400 (or not in my case as I made the recipe today and will be baking on Thursday). Cook pasta in SALTED water (as we learned in our cooking class, this step is very important as it's the only time you can add flavor to the pasta). Add the cauliflower during the last 3 minutes of cooking time and then drain. Transfer into large bowl.
2. Meanwhile, grate cheese if needed (and I did need).

3. In a food processor, pulse bread until you have crumbs. Add the parsley, Parmigiano cheese, and 1/4 teaspoon pepper. Stream in 2 tablespoons of olive oil...or less...just need to the the crumbs moist and should look like this:

4. On medium heat, add 1 TBS olive oil to pan and saute onion until translucent and starting to brown.

5. Then add 1/4 tsp salt and 1/2 tsp pepper (or more depending on your tastes), cheese, sour cream and milk. Reduce heat to low and cook until cheese melts.

6. Pour over cauliflower and pasta mix to coat

7. Once combined, pour into an oven safe baking dish

8. Top with bread crumb mixture and bake until golden brown, about 15 minutes

Enjoy!
Our menu for the week is:
Sunday-Rivel (or Ribble based on your family) soup, as requested by Chris. Every family makes theirs differently; I include chicken, onions, potatoes and the rivels (a rustic, easy to make dumpling).
Monday-Sweet potatoes with chicken and rosemary saute
Tuesday (our meatless meal)-Cauliflower Mac and Cheese (already made)
Wednesday-Kale and Spinach lasagna (already made)
Thursday-Missy's White Chicken Chili (already made)
Friday-left overs/go out
The secret ingredient of our mac and cheese-cauliflower!

Sometimes you just want comfort food and that is what this mac and cheese is, comfort food with a healthy twist. Instead of using straight macaroni noodles, I use 100% whole wheat pasta with cauliflower...once it gets covered with cheese, it's hard to notice! The recipe is adapted from Real Simple magazine.
Ingredients:
12 ounces whole wheat pasta (I like to use a fun, twisty shape like cavatappi or rigatoni)
1 head cauliflower, chopped
2 slices whole grain bread
1/4 cup dried parsley or 1/2 cup fresh
1/4 fresh grated Parmigiano cheese
olive oil
1 onion, finely chopped
1 1/2 cups grated cheddar cheese (I like extra-sharp cheddar....more flavor!)
1 1/2 cups fat-free sour cream
1/2 cup fat free milk
salt and pepper to taste
Directions:
1. Start by heating the oven to 400 (or not in my case as I made the recipe today and will be baking on Thursday). Cook pasta in SALTED water (as we learned in our cooking class, this step is very important as it's the only time you can add flavor to the pasta). Add the cauliflower during the last 3 minutes of cooking time and then drain. Transfer into large bowl.
2. Meanwhile, grate cheese if needed (and I did need).


4. On medium heat, add 1 TBS olive oil to pan and saute onion until translucent and starting to brown.

5. Then add 1/4 tsp salt and 1/2 tsp pepper (or more depending on your tastes), cheese, sour cream and milk. Reduce heat to low and cook until cheese melts.

6. Pour over cauliflower and pasta mix to coat

7. Once combined, pour into an oven safe baking dish

8. Top with bread crumb mixture and bake until golden brown, about 15 minutes

Enjoy!
Thursday, January 5, 2012
Pain de Campagne (Country French Bread)
One of my goals for 2012 is to make our bread (I read Animal, Vegetable, Miracle by Barbara Kingsolver while on vacation and now I'm inspired to make more local food choices....I highly recommend the book!) So here is my first attempt, based on a recipe I found at Allrecipes.com. I used regular flour instead of bread flour and subbed some whole wheat in as well. I forgot to add the salt so ours turned out to be a little lacking in flavor but it has enough promise that I'll try it again! Maybe I'll include some spelt or oat flour next time as well...with the salt, of course!

Ingredients
Directions
Wednesday, January 4, 2012
Meal Planning and Black Bean Soup
One thing that is very important to me is feeding our family at home. I'm not saying that we don't go out, we do (and we have favorite places like North Star Cafe or Skillet) but the majority of our meals are made at home. One way to ensure this happens is to plan out our meals. On Sunday, I sit down with my cookbooks/magazines/recipes and first plan out the menu and then the shopping list. It's a total time saver for the rest of the week! My friend Kelly sent me these great recipe markers for Christmas...perfect for tagging recipes (and you can see our new french cook book from our friend Grant..I'll be using that later this week):

On the menu for last night was our first meatless meal, Black Bean Soup (adapted from Edible Columbus, recipe by Tricia Wheeler):
Ingredients:
1 pound dried black beans
12 cups water-note I should have used less
2 bay leaves-I omitted
1/2 cup olive oil-I decreased to a few tablespoons
2 large red peppers, cored, seeded and diced
2 medium onions, coarsely chopped
8 medium cloves of garlic, peeled, smashed and chopped
1 tablespoon ground cumin
1 tablespoon dried oregano
1 tablespoon chili powder
2 tablespoons salt-I used more
Directions:
Soak black beans overnight in water
Saute onions and peppers in olive oil until soft. Then add garlic, cumin, oregano and chili powder and cook for a few more minutes. (I did these steps the previous night)

Garnish with toppings of choice:
Crushed tortilla chips
Sour cream
Diced jalapeno peppers
Fresh cilantro
Cheddar cheese

The review: I will make this soup again (Chris really liked it) but next time less water. Chris was worried that the soup wouldn't keep him full but that wasn't the case. It makes a huge amount so we will be eating it for days!
Tuesday, November 15, 2011
Spicy Caramel Corn
Looking for a recipe for a quick, popular and EASY treat that is easily portable? That's when I break out this recipe for spicy caramel corn...I'm sure I've made it hundreds of times. We've taken it tailgating and to parties. I've sent it to both Iraq and Afghanistan (many, many times because it travels well) when Chris was deployed because guys really seem like the kick of the cayenne pepper and the way it offsets the sweetness of the caramel coating. Seriously, it's delicious and easy (as in, you use the microwave) so give it a try:

Spicy Caramel Corn:
Ingredients:
2 batches of popcorn (popped) in a brown grocery bag
1 stick butter, melted
1 c. brown sugar
1/2 c. white corn syrup
1/2 t. salt
1/2 t. cinnamon
1/2 t. cayenne pepper
1/2 t. baking soda
Combine butter, brown sugar, corn syrup and salt in a microwave safe bowl and microwave until boils. Continue to microwave for 2 minutes. Stir in baking soda, cayenne pepper and cinnamon, mixture will become "fluffier" (this will make sense, I promise). Pour over popcorn in bag and shake to distribute. Fold over top of bag and place in the microwave on side. (I turn my microwave down to 80% here...each microwave is different you may need to adjust) Microwave for 1 minute and 30 seconds. Remove from microwave and shake bag. Place back in microwave on the other side and microwave for 1 minute and 15 seconds. Pour caramel corn onto foil and allow to cool. Once cool seal in an air-tight container and enjoy. If you have kids or don't like heat, feel free to skip the cinnamon and cayenne pepper but if you like spicy add some extra! I used to double the cayenne before sending to the guys deployed... you know, because their lives weren't "spicy" enough!

Saturday, October 22, 2011
Browned Butter Pumpkin Cupcakes with Cinnamon Butter Cream Frosting
Over the weekend, Chris and I attended our 10 year class reunion. We were only able to stay for a few hours because of the marathon the next morning but had so much fun catching up with our classmates and seeing what everyone is up to these days. I decided to make something that was perfect for fall and these cupcakes where the perfect treat. Here's the original recipe, check out the beautiful photos!
Yield: About 25 cupcakes
Cake:
3/4 cup unsalted butter
2 cups all-purpose flour
1 1/2 tsp. baking soda
3 tsp. ground cinnamon
1 tsp. ground ginger
1 tsp. salt
1/4 tsp. allspice
1 1/2 cups granulated sugar
1/2 cup firmly packed light brown sugar
1 1/2 cups pumpkin puree
3 large eggs
1/2 cup sour cream
- If making pumpkin puree (remember that pumpkin I got at the farmers market with the butternut squash and apples??), split sugar pumpkin and remove seeds. Place halves on baking sheet and cover with foil. Cook at 350 for 1 to 1 1/2 hours or until tender. Scrape pumpkin out of skin and puree. I added a bit of water to thin it out.


- Preheat oven to 350 degrees. Line cupcake tins with papers.
- Melt the butter in a saucepan over medium heat. Cook, swirling the pan occasionally until the butter turns golden brown. Pour the browned butter into a small bowl and let stand until cool but not solidified. I didn't have that kind of time and put mine in the freezer to chill for a few minutes.
- In a medium bowl, whisk the flour, baking soda, cinnamon, ginger, salt and allspice. Set aside.
- In a large bowl, whisk 1 ½ cups of pumpkin puree with the granulated sugar, brown sugar, eggs and sour cream until well combined. Stir in the flour mixture until just combined. Whisk in the browned butter until well blended.

- Divide batter between cupcake liners. Fill them about half full.
- Bake cupcakes for 20-25 minutes, or until they spring back when pressed in the middle.
Cinnamon Frosting:
1 1/2 cups sugar
1/4 cup all-purpose flour
1 1/2 cups milk
1/4 cup heavy cream
1 1/2 cups (3 sticks) unsalted butter, soft but cool, cut into small pieces
1 teaspoon pure vanilla extract
2 teaspoons cinnamon
- In a medium saucepan, whisk the sugar and flour together. Add the milk and heavy cream and cook over medium heat, whisking occasionally until the mixture comes to a boil and has thickened, about 20 minutes.
- Transfer the mixture to the bowl of an electric mixer fitted with the paddle attachment. Beat on high speed until cool. (NOTE: Do not leave unattended like I did...you WILL end up with butter cream frosting whipping out of the bowl and all over your kitchen...I speak from experience.) Reduce the speed to low and add the butter; beat until thoroughly incorporated. Increase the speed to medium-high and beat until the frosting is light and fluffy. Add the vanilla and cinnamon and continue mixing until combined.
 |
| See the white specs, that's frosting...ALL OVER THE KITCHEN! |

Tuesday, October 11, 2011
Cream Cheese Apple Pie With Oatmeal Pecan Stresuel Topping
A few weeks ago, Chris and I stopped at a farmers market to pick
up a few things (so far I've made butternut squash risotto and have plans for the pumpkin and acorn squash):

In addition to getting these fall treats, I also bought a bag of locally grown Jonathan apples for snacking and for pie making.

I made this pie for a dinner with family this weekend and oh my goodness, it was really yummy. It's a cross between cheese cake and apple pie, delicious!
From the kitchen of Kim Landhuis of DeWitt, Michigan
1st Place in 2010 Michigan’s Best Apple Pie Contest. Find her recipe here.
Ingredients
Pie crust (I used store-bought that you roll into the pie pan)
Filling:
4 large apples, peeled and sliced (I used Jonathan)
1 cup plus 2 tablespoons sugar (reserve 6 tablespoons)
4 tablespoons butter, melted
3 tablespoons flour
1 teaspoon cinnamon
1 (8 oz.) cream cheese, softened (I used reduced fat)
1 large egg
½ teaspoon vanilla
Filling:
4 large apples, peeled and sliced (I used Jonathan)
1 cup plus 2 tablespoons sugar (reserve 6 tablespoons)
4 tablespoons butter, melted
3 tablespoons flour
1 teaspoon cinnamon
1 (8 oz.) cream cheese, softened (I used reduced fat)
1 large egg
½ teaspoon vanilla
Topping:
½ cup unbleached flour
1 cup brown sugar
½ cup oatmeal
¾ cup chopped pecans
½ cup (1 stick) hard butter
½ cup unbleached flour
1 cup brown sugar
½ cup oatmeal
¾ cup chopped pecans
½ cup (1 stick) hard butter
Preparation
Heat oven to 400 degrees. Place crust onto a 9-inch pie pan. Flute the edge. Use a fork to
prick crust before baking for 12 minutes. Remove and place on rack.
Reduce oven to 375 degrees.
Meanwhile, in a large saucepan, over medium heat, stir and
cook apple, sugar, melted butter, flour and cinnamon for 15 minutes (IMPORTANT, continue to stir the mixture. I didn't and we had some burnt apples that I had to separate out). Spoon mixture over pie crust.
Beat cream cheese, the remaining sugar, egg and vanilla until smooth and pour on top of apples. Fold the cream cheese into apple mixture. Bake for 25 minutes or until filling is set. Cover the edge with aluminum foil.
Subscribe to:
Posts (Atom)